
I absolutely adore this Salted Caramel Apple Pie Bars Recipe because it captures all the cozy, comforting flavors of traditional apple pie but in a fun, portable bar form that’s perfect for any occasion. The tender apples, warm spices, and luscious salted caramel swirled throughout make every bite a delightful mix of sweet and salty that I can’t get enough of. Whenever I crave a dessert that feels like a hug in food form, these bars are my go-to treat.
Why You’ll Love This Salted Caramel Apple Pie Bars Recipe
What truly makes this Salted Caramel Apple Pie Bars Recipe stand out to me is the incredible marriage of flavors—the rich, buttery crust pairs beautifully with the cinnamon-spiced apple filling, but the surprise twist is definitely that salted caramel drizzle that adds a luxurious depth and just the right amount of saltiness to balance the sweetness. When you bite into it, you get this satisfying texture contrast as well, with the tender apples nestled between the flaky crust and the sticky caramel topping. It’s a perfect harmony of flavors and textures that’s incredibly addictive.
I also love how straightforward and approachable this recipe is to make. You don’t have to be an expert baker to whip these bars up, and yet the result feels like something special enough to serve at a holiday gathering or family get-together. Whether you’re baking for a crowd or just treating yourself on a quiet evening, these bars come together quickly, and the ingredients are simple staples that transform into something truly spectacular. For me, this recipe nails the comfort-food vibe with a hint of elegance.
Ingredients You’ll Need

These ingredients are simple but essential, each adding its own magic—whether it’s the crisp sweetness of the apples, the warm spice notes, or the silky salted caramel that ties everything together. With just these basics, you’ll create a beautiful balance of taste, texture, and color in every bar.
- Apples: I prefer using tart but firm varieties like Granny Smith for that perfect fresh bite and slight tang that balances the sweetness.
- All-purpose flour: This builds the base crust, giving it that flaky and tender texture I love.
- Cinnamon and nutmeg: The cozy spices add warmth and depth to the apple filling, making every bite feel like fall.
- Butter: I always use cold, unsalted butter to create a rich, crumbly crust and enhance flavor without overpowering.
- Brown sugar: Adds a hint of molasses sweetness that pairs beautifully with the apples and caramel.
- Granulated sugar: Balances the tartness of the apples and sweetens the caramel perfectly.
- Salted caramel sauce: This is the star that gives the bars their lush, indulgent finish and that irresistible salty-sweet contrast.
- Egg: Used to bind the crust and help it set with a lovely golden hue.
- Lemon juice: Tossed with the apples to keep them bright and to add a little zing against the sweetness.
Directions
Step 1: Preheat your oven to 350°F (175°C). Lightly grease or line a 9×13 inch baking pan with parchment paper, leaving some overhang for easy removal later.
Step 2: In a medium bowl, mix together 2 cups of all-purpose flour, 1/4 cup of brown sugar, and a pinch of salt. Cut in 1 cup of cold, unsalted butter using a pastry cutter or your fingers until the mixture resembles coarse crumbs. Then, add 1 beaten egg and stir just until the dough comes together.
Step 3: Press about two-thirds of this dough evenly into the bottom of your prepared pan to form the crust layer. Bake this crust for 15 minutes or until it just starts to turn golden around the edges.
Step 4: While the crust bakes, peel, core, and thinly slice 4 medium apples. Toss them with 2 tablespoons of granulated sugar, 1 tablespoon of lemon juice, 1 teaspoon of cinnamon, and 1/4 teaspoon of nutmeg. This will soften the apples slightly and infuse them with spice.
Step 5: Once the crust is partially baked, remove it from the oven and spread the apple mixture evenly over the top. Crumble the remaining third of the dough over the apples, creating a rustic topping.
Step 6: Return the pan to the oven and bake for another 35-40 minutes until the topping is golden brown and the apple filling is bubbly and fragrant.
Step 7: Remove the bars from the oven and while still warm, drizzle generously with your salted caramel sauce—feel free to get creative with the drizzle pattern to make it look extra inviting.
Step 8: Let the bars cool in the pan for at least 30 minutes so they firm up for clean slicing. Once cool, use the parchment overhang to lift them out and cut into squares or rectangles as you prefer.
Servings and Timing
This recipe makes about 12 generous bars, perfect for sharing or storing for later indulgence. The prep time is roughly 20 minutes, with about 55 minutes of total baking time, including the two baking stages. Add in cooling time of approximately 30 minutes for the best texture before slicing and serving. Altogether, expect about an hour and a half from start to finish, which I think is well worth it for how delicious these bars turn out.
How to Serve This Salted Caramel Apple Pie Bars Recipe
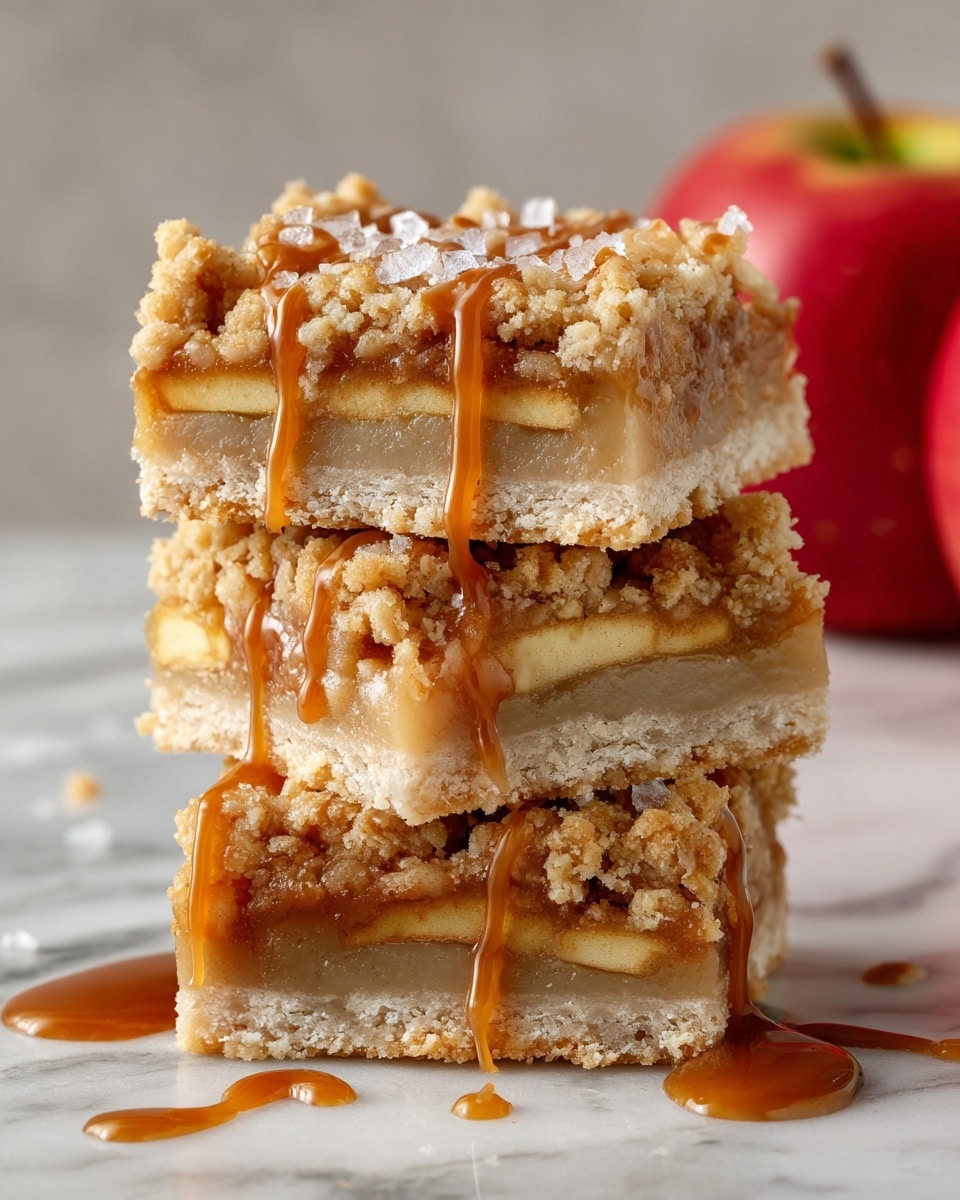
I love serving these salted caramel apple pie bars a little warm so the caramel is perfectly gooey and the apples are tender but still hold their shape. A scoop of vanilla ice cream or a dollop of whipped cream on the side instantly elevates the experience, adding creaminess that complements the sweet and salty notes. For a less indulgent option, a simple dusting of powdered sugar adds a beautiful visual touch and a hint of extra sweetness.
These bars also pair wonderfully with a hot cup of coffee or a comforting chai tea for a cozy dessert or snack moment. If you’re planning to serve them at a party or holiday meal, I recommend arranging them neatly on a decorative platter with a few fresh apple slices or cinnamon sticks for an inviting presentation. They also work amazingly well as a sweet treat for a casual family dinner or even a bake sale—they’re portable and easy to handle.
For beverage pairings, a glass of crisp apple cider (hot or cold) really resonates with the apple and caramel flavors, or if you’re in the mood for wine, try a chilled Riesling or a late-harvest wine with a touch of sweetness that complements the dessert’s richness. No matter how you serve them, these bars always bring a little extra warmth and joy to the table.
Variations
If you want to switch things up, I suggest experimenting with different apple varieties; combining tart Granny Smith with sweeter Fuji or Honeycrisp apples creates a more complex flavor profile. Another delicious twist is to add chopped pecans or walnuts to the crumble topping for extra crunch and nutty goodness—I love that little textural contrast.
For those following gluten-free diets, you can substitute the all-purpose flour with a gluten-free blend that’s suitable for baking. I’ve also made these bars with vegan butter and a flax egg successfully, so it’s simple to make this dessert vegan-friendly without sacrificing taste or texture. Just be sure to select a salted caramel sauce that fits your dietary needs or make your own vegan caramel to drizzle on top.
If you want to kick the flavor up a notch, a splash of bourbon or vanilla extract in the apple mixture adds an adult touch that’s incredibly tasty. Alternatively, swapping out the cinnamon and nutmeg for chai spice mix or pumpkin pie spice can give the bars a delightful seasonal twist. You could even try baking these bars in muffin tins for individual portions that are perfect for grab-and-go snacking!
Storage and Reheating
Storing Leftovers
I like to store leftover bars in an airtight container at room temperature for up to 2 days, or in the fridge if I want them to last longer—usually up to 5 days. Using a tight-sealing container helps keep the crumble topping crisp while preventing the apples from drying out. If you refrigerate, allow the bars to come to room temperature before serving for the best flavor and texture.
Freezing
These bars freeze exceptionally well. To freeze, I wrap the cooled bars tightly in plastic wrap and then place them in a freezer-safe container or a resealable plastic bag. They can be frozen for up to 3 months. When you’re ready to enjoy them, I recommend thawing them overnight in the fridge to retain their moisture and texture.
Reheating
To bring these bars back to life after storing or freezing, I gently warm them in a preheated oven at 325°F (160°C) for about 10–15 minutes. This method helps crisp the topping again without drying out the filling. I avoid microwaving because it tends to make the crust soggy and the caramel overly sticky. Just a little warming is all you need to recapture that delicious freshly-baked feeling.
FAQs
Can I use different fruits instead of apples in this Salted Caramel Apple Pie Bars Recipe?
Absolutely! Pears, peaches, or even a mix of berries can work beautifully depending on the season and your taste preferences. Just adjust the sweetness and spice levels accordingly, since each fruit has a unique flavor and moisture content.
Is it possible to make the salted caramel sauce from scratch?
Yes, making your own salted caramel sauce is pretty straightforward and adds a lovely homemade touch. It usually involves melting sugar until caramelized, then adding butter, cream, and a pinch of salt. I find homemade caramel has fresher flavor, but store-bought is a great shortcut when you need to save time.
Can I prepare these bars ahead of time for a party or event?
Definitely. These bars hold up well and actually taste even better after sitting for a few hours, allowing the flavors to meld. You can bake them a day ahead, store covered at room temperature or in the fridge, and add the salted caramel drizzle just before serving to keep it looking beautiful.
What’s the best type of apple to use for baking these bars?
I recommend tart and firm apples like Granny Smith, which hold their shape well during baking and provide a nice contrast to the sweetness of the caramel. Mixing them with a sweeter variety like Fuji or Honeycrisp can add complexity and balance.
Can I make these bars vegan or gluten-free?
Yes! Use vegan butter and a flax egg substitute to make vegan bars, and swap the all-purpose flour for a gluten-free baking blend to accommodate gluten sensitivities. Just check that your salted caramel sauce fits your dietary needs or make a homemade vegan version.
Conclusion
I truly hope you give this Salted Caramel Apple Pie Bars Recipe a try because it has become one of my absolute favorite ways to enjoy classic apple pie in a fun, shareable form. The combination of tender apples, warm spices, buttery crust, and that irresistible salted caramel drizzle creates a dessert that feels both comforting and a little bit special. Whether you’re baking for friends, family, or just yourself, these bars never disappoint and always bring a smile to my face. Happy baking!


