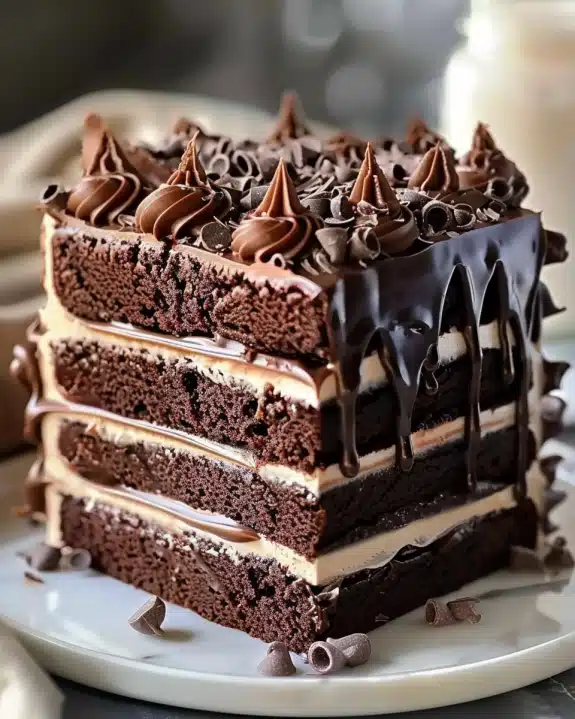
I absolutely adore making and sharing My Favorite Chocolate Frosting Recipe because it never fails to bring smiles and a touch of sweetness to any dessert. This frosting is rich, creamy, and perfectly chocolatey, yet incredibly easy to whip up in just a few minutes. Whenever I slather it on a cake or cupcakes, it feels like wrapping them in a warm, delicious hug that everyone appreciates.
Why You’ll Love This My Favorite Chocolate Frosting Recipe
What truly makes this chocolate frosting stand out to me is its perfectly balanced flavor profile. It’s decadently chocolate without being overpowering, with just the right amount of sweetness and a silky smooth texture that melts on your tongue. When I make it, I always notice how it enhances the overall dessert experience by adding an indulgent layer that complements rather than overwhelms the cake or brownies it accompanies.
Another reason I treasure this recipe is how incredibly simple it is to prepare. Sometimes the best recipes are the ones you can quickly pull together with minimal fuss, and this frosting fits that description perfectly. Whether I’m making a birthday cake on a weeknight or decorating cupcakes for a spontaneous get-together, I know I can rely on this recipe to deliver consistently amazing results. It’s so versatile that I use it for holidays, celebrations, and just whenever I want to treat myself and loved ones to something special without spending hours in the kitchen.
Ingredients You’ll Need

This recipe uses a handful of simple, pantry-friendly ingredients that combine to create a frosting with rich chocolate flavor, perfect texture, and beautiful color. Each ingredient plays an important role in making this frosting irresistibly smooth and luscious.
- Unsweetened cocoa powder: Provides that deep, classic chocolate taste and intense color.
- Powdered sugar: Sweetens the frosting and helps achieve that fluffy, light texture.
- Butter: Adds creaminess and richness; I always use unsalted for better control over sweetness.
- Vanilla extract: Enhances the chocolate flavor with a subtle, warm note.
- Milk or heavy cream: Used to adjust consistency and make the frosting silky and spreadable.
Directions
Step 1: Start by softening your butter to room temperature. I find this is crucial for the smoothest consistency, so if you forget, just microwave it in short bursts of 5-10 seconds until soft but not melted.
Step 2: In a large mixing bowl, combine the softened butter with the unsweetened cocoa powder. Beat them together at medium speed until well blended and creamy—about 2 minutes. This step ensures the cocoa powder is fully incorporated without lumps.
Step 3: Gradually sift in the powdered sugar to prevent clumps, mixing continuously on low speed. Add a little powdered sugar at a time so it blends smoothly without getting dusty.
Step 4: Pour in the vanilla extract and 2 tablespoons of milk or heavy cream. Beat everything at high speed for 3-4 minutes. If the frosting feels too stiff, add more milk, one teaspoon at a time, until you reach the ideal consistency for spreading or piping.
Step 5: Stop mixing once the frosting is light, fluffy, and spreadable. Taste it to check the sweetness and chocolate intensity—feel free to tweak by adding more cocoa or powdered sugar if you want it richer or sweeter.
Servings and Timing
This recipe makes enough frosting to generously cover one standard 9-inch two-layer cake or about 24 cupcakes. It takes roughly 10 minutes of total prep and mixing time, with no cooking required. No resting or cooling time is needed, so you can use it immediately after making. It’s perfect when you need a quick, crowd-pleasing frosting without waiting around.
How to Serve This My Favorite Chocolate Frosting Recipe

I love using this chocolate frosting on classic vanilla or chocolate cakes, but it also pairs beautifully with red velvet, carrot cake, or even simple sugar cookies. Its creamy richness balances lighter flavors perfectly. For an extra special touch, I sometimes add fresh berries or a sprinkle of crushed nuts on top to add texture and a pop of color.
When it comes to presentation, spreading this frosting smoothly with a spatula creates an elegant, rustic cake look, or you can also pipe it in rosettes or swirls for a more polished appearance at parties and gatherings. Garnishing with chocolate shavings or a dusting of cocoa powder elevates the look and excites the taste buds.
For beverage pairings, I’m a big fan of serving this alongside a nice cup of freshly brewed coffee or a rich hot chocolate to intensify the chocolate experience. For adult occasions, a glass of dessert wine or a creamy espresso martini also works wonderfully. I usually serve the frosting at room temperature so it’s soft and creamy, never hard or oily, which lets the flavor shine through perfectly.
Variations
I often like to tweak My Favorite Chocolate Frosting Recipe depending on my mood or dietary needs. For a dairy-free version, I substitute vegan butter and almond or oat milk, which still gives a luscious, creamy texture without compromising flavor. If you want more intense chocolate notes, adding melted bittersweet chocolate instead of cocoa powder works like a dream.
For those who enjoy a flavor twist, a pinch of cinnamon or espresso powder stirred into the frosting adds a delightful depth and complexity that complements the chocolate beautifully. I’ve also experimented with orange zest for a bright, citrusy contrast that’s surprisingly refreshing.
If you’re in a rush or want a lighter version, you can try using Greek yogurt or cream cheese in place of some butter for a tangy, creamy twist. Just remember those will alter the texture and shelf life a bit, but the flavor remains sensational.
Storage and Reheating
Storing Leftovers
If you have leftover frosting, I recommend storing it in an airtight container in the refrigerator. It will keep fresh for up to one week. Before sealing, make sure the frosting is covered tightly to prevent it from absorbing other odors from the fridge. When ready to use again, let it sit at room temperature and give it a quick stir to bring back its creamy consistency.
Freezing
This frosting freezes quite well if you want to prepare in advance. Spoon it into a freezer-safe container or zip-top bag, smoothing it out to eliminate air pockets. It can be frozen for up to three months without losing flavor or texture. When you’re ready to use it, thaw it overnight in the refrigerator and then bring it to room temperature before mixing gently to restore that perfect frosting softness.
Reheating
I don’t recommend reheating chocolate frosting directly in a microwave or on the stove, as the heat can cause it to separate or become grainy. Instead, let it soften naturally at room temperature or use a warm water bath by placing the frosting container in a bowl of warm water for a few minutes. Stir frequently until smooth, and it will regain that luscious texture ready for spreading or piping.
FAQs
Can I use regular cocoa powder instead of unsweetened cocoa powder?
I always suggest using unsweetened cocoa powder because it has no added sugar, which helps you control the sweetness more precisely. Using sweetened or Dutch-processed cocoa will change the flavor and may result in a sweeter, less balanced frosting.
Is this frosting suitable for piping decorations?
Absolutely! When whipped to the right consistency, this frosting is smooth and holds shape well, making it perfect for piping rosettes, borders, and other decorations on cakes and cupcakes.
Can I make this frosting ahead of time?
Yes, you can prepare this frosting a day or two in advance. Just keep it covered in the fridge and bring it back to room temperature before using. Give it a quick whip again if needed to refresh its texture.
How do I adjust the frosting if it’s too thick or too thin?
If your frosting feels too thick, add a teaspoon of milk at a time until you reach the desired consistency. If it’s too thin, mix in a bit more powdered sugar gradually to thicken it up.
Can I add other flavors to this frosting?
Definitely! Vanilla is a classic, but you can experiment with almond extract, peppermint, espresso powder, or even a splash of liqueur for adult desserts. Just add a small amount to avoid overpowering the chocolate.
Conclusion
I hope you’re as excited to try My Favorite Chocolate Frosting Recipe as I am every time I make it. It’s a simple yet incredibly satisfying way to elevate any dessert, adding that rich, creamy chocolate goodness everyone loves. Trust me, once you start using this frosting, it’ll quickly become a staple in your baking repertoire too!