
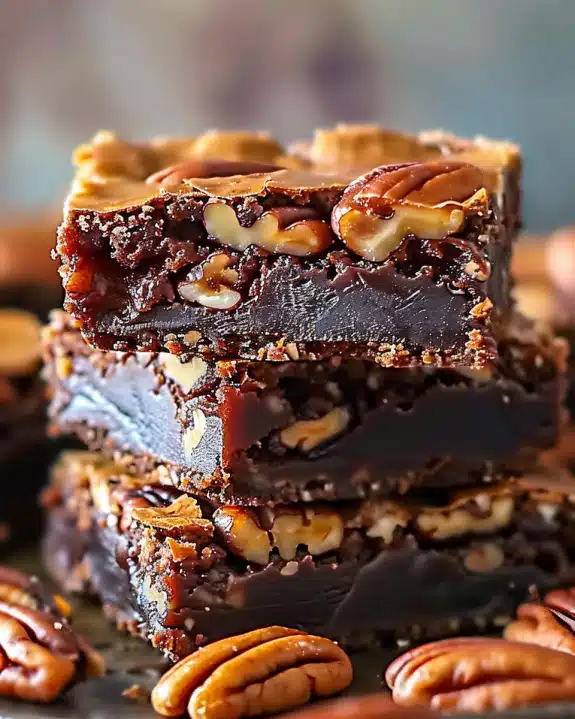
Why You’ll Love This Recipe
I love this Peanut Butter Cup Dump Cake because it’s so easy to make, yet it’s packed with indulgent flavors. The combination of chocolate cake mix, creamy peanut butter, and gooey chocolate chips creates the most deliciously messy and comforting dessert. It’s an absolute crowd-pleaser and great for parties, or whenever I’m craving a sweet treat with minimal effort. Plus, it’s completely customizable—add extra peanut butter cups or even drizzle some caramel for an extra touch of sweetness.
Ingredients
-
1 box chocolate cake mix
-
1 cup creamy peanut butter
-
1 cup milk
-
1 cup chocolate chips
-
1 cup peanut butter cups, chopped
-
1/2 cup vegetable oil
-
3 large eggs
-
1 teaspoon vanilla extract
-
1 cup powdered sugar (optional, for topping)
(Tip: You’ll find the full list of ingredients and measurements in the recipe card below.)
Directions
-
Preheat the oven to 350°F (175°C) and grease a 9×13-inch baking dish.
-
In a large mixing bowl, combine the chocolate cake mix, peanut butter, milk, vegetable oil, eggs, and vanilla extract. Mix well until the batter is smooth and creamy.
-
Stir in the chocolate chips and chopped peanut butter cups, making sure they’re evenly distributed throughout the batter.
-
Pour the batter into the prepared baking dish and spread it out evenly.
-
Bake in the preheated oven for 35-40 minutes, or until a toothpick inserted in the center comes out clean. The cake will be soft, gooey, and slightly fudgy in texture—perfect for a dump cake!
-
Allow the cake to cool slightly before serving. For an extra indulgent touch, you can dust the top with powdered sugar, though this is optional.
-
Serve warm and enjoy the deliciously gooey, chocolate-peanut butter goodness!
Servings and Timing
This recipe makes 8-10 servings, depending on how large you slice the cake. The total time to prepare and bake the cake is about 50 minutes, including 10 minutes of prep time and 35-40 minutes of baking time.
Variations
-
Peanut Butter Lovers: Add extra chopped peanut butter cups or peanut butter chips for a more intense peanut butter flavor.
-
Add Nuts: I can mix in some crushed peanuts or walnuts for a crunchy texture contrast.
-
Swirl in More Chocolate: For even more chocolate, swirl some extra chocolate syrup or melted chocolate on top of the batter before baking.
Storage/Reheating
Leftover Peanut Butter Cup Dump Cake can be stored in an airtight container at room temperature for up to 2-3 days. To reheat, I simply place a piece in the microwave for about 15-20 seconds for that warm, gooey texture. It also stores well in the fridge for a few days.
FAQs
Can I use a different cake mix flavor?
Yes! While chocolate cake mix is the traditional choice, I can use other cake mixes like yellow or even peanut butter flavor to complement the peanut butter and chocolate theme.
Can I make this cake ahead of time?
Absolutely! You can prepare the dump cake a day ahead, and it will still taste amazing. Just store it in an airtight container and reheat individual servings in the microwave before serving.
Can I make this recipe without peanut butter cups?
Yes! If I don’t have peanut butter cups, I can simply add more peanut butter chips or chopped-up Reese’s Pieces for that same peanut butter flavor.
How do I know when the cake is done?
The cake will be done when a toothpick inserted into the center comes out clean or with a few moist crumbs attached. It will still be gooey in the center, which is the perfect texture for a dump cake.
Can I freeze this cake?
Yes, you can freeze this dump cake! Let it cool completely, then wrap it tightly in plastic wrap or foil and freeze for up to 2 months. To reheat, bake it in the oven or microwave until warmed through.
Conclusion
Peanut Butter Cup Dump Cake is the perfect treat when I want something indulgent, easy to make, and incredibly satisfying. The combination of chocolate and peanut butter is always a winner, and with minimal effort, I get a dessert that’s sure to impress anyone. Whether I’m serving it at a family dinner, a potluck, or just as a special treat for myself, this cake is always a hit! Try it out—every bite is pure bliss!
PrintPeanut Butter Cup Dump Cake

Cinnamon Roll Muffins offer the comforting flavor of cinnamon rolls in a quick and easy muffin form. Fluffy, sweet, and with a beautiful cinnamon swirl, they’re perfect for breakfast, snacks, or gatherings!
- Prep Time: 10 minutes
- Cook Time: 18-20 minutes
- Total Time: 30 minutes
- Yield: 12 muffins
- Category: Breakfast, Snack
- Method: Baking
- Cuisine: American
- Diet: Vegetarian
Ingredients
Dry Ingredients:
2 cups all-purpose flour
2 teaspoons baking powder
¾ cup granulated sugar
1 tablespoon ground cinnamon
½ teaspoon salt
Wet Ingredients:
1 cup milk (or buttermilk for a richer texture)
¼ cup melted unsalted butter
2 large eggs
1 teaspoon vanilla extract
Cinnamon Swirl Filling:
½ cup brown sugar
1 tablespoon ground cinnamon
Optional:
Cream cheese frosting (for topping)
Chopped nuts or chocolate chips (for an indulgent twist)
Instructions
Preheat Oven: Preheat your oven to 375°F (190°C). Line a muffin tin with paper liners or spray with nonstick cooking spray.
Mix Dry Ingredients: In a large bowl, whisk together flour, baking powder, sugar, cinnamon, and salt until well combined.
Mix Wet Ingredients: In another bowl, mix together milk, melted butter, eggs, and vanilla extract until smooth.
Combine Wet and Dry: Gently fold the wet ingredients into the dry ingredients, being careful not to overmix to maintain a fluffy texture.
Add Cinnamon Swirl: In a small bowl, mix brown sugar and cinnamon for the swirl. Gently swirl half of the cinnamon mixture into the batter before topping it with the remaining batter. Add the rest of the cinnamon mixture to create the signature swirl.
Fill Muffin Tin and Bake: Fill the muffin cups about two-thirds full with the batter. Bake for 18-20 minutes or until the tops are golden brown and a toothpick inserted comes out clean.
Cool and Serve: Let the muffins cool slightly before enjoying. Serve warm for the best experience!
Notes
Make Ahead: You can refrigerate unbaked muffins overnight. Just pop them in the oven for fresh muffins in the morning!
Frozen Muffins: After baking, let the muffins cool completely, then freeze them in an airtight container for up to 3 months. Reheat in the microwave for 20 seconds.
Add-Ins: Customize with nuts, chocolate chips, or a drizzle of cream cheese frosting for an indulgent treat.


